Easy Christmas Crafts for Girl Scout Juniors

This super cute little idea came from one of our leaders. Our Daisies were learning how to make new friends and it was their first official meeting, so she found an idea from tracyblogspot and decided to do something similar.
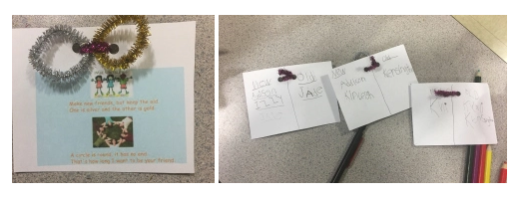
First, she made little cards that said, Make new friends, but keep the old – One is silver and the other's gold. These lyrics are from the old scout song, Make New Friends. Next, she gave each of the girls small pieces of gold and silver pipe cleaners to make little silver and gold rings. After punching two holes in the card, she used another small piece of a pipe cleaner to teach the girls how to attach their rings. Finally, on the back (my favorite part), she had the girls write the names of their old Daisy friends and their new Daisy friends.
The girls had so much fun making new friends, asking each other to spell their name, and singing the song. I can't wait to see what they come up with next week.
If you like this or would like to see a different game/craft that we have done with our scouts, please click menu, Girl Scouts at the top or anything below.
- Daisy/Brownie Reindeer Ornaments
- Girl Scout Cookie "Headbandz" Game
- Scout Candy Cane
- Girl Scout Bridging Ceremony
Looking for a fun and easy Holiday gift or something to give a teacher, hostess or co-worker.
This super easy recipe was fun and my kids even helped.
I started by using a recipe from allrecipes.com.
Ingredients:
- ½ cup confectioner's sugar
- ½ cup butter
- ½ cup honey
- 1 teaspoon cinnamon
Blend everything together until whipped (about 3-5 min) Tastes amazing but if it is too sweet, you can make some using pumpkin pie spice. YUM!
Makes about ½ pint.
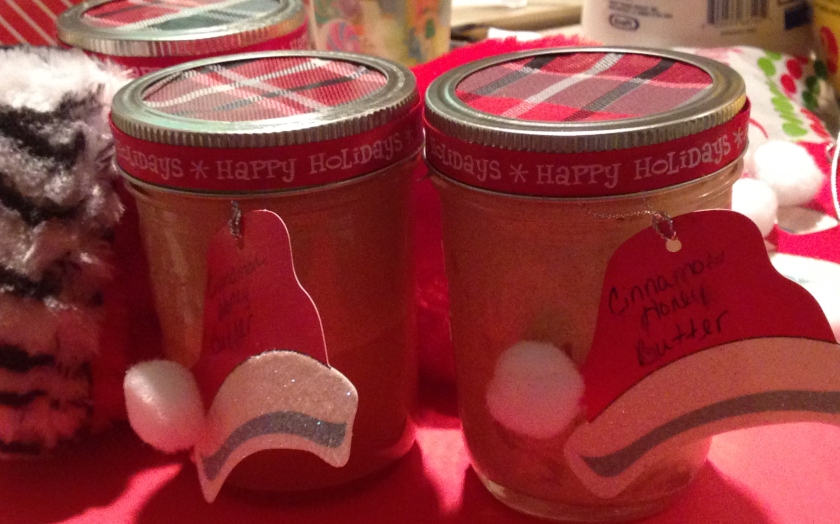
Gift Ready
- To make it gift ready, my daughter traced outlines of the top on the back of wrapping paper – then cut it out and glued it on the top of the jar using hot glue.


-To make the top of the jar complete, we used hot glue and some ribbon to wrap the top of the jar.
-After pouring the butter into the jar, using a spatula, we added the top of the jar, a tag that said Cinnamon Honey Butter and it was complete.
We made several of these batches using to give to friends and family. So far they have been a big hit! Next year, we are going to try to make these in our older Girl Scout troop. Should be great!!
Last week, we were looking for another easy Christmas craft that our older Girl Scouts could do and came across this in Hobby Lobby. I love easy, fun crafts that the girls can do in a meeting or less and this was no exception.

You could very easily buy all the parts to this or possibly may have them on hand. However, if you're like me and looking for something to add at last minute, Hobby Lobby sells a box with all of the pieces included for 24 candy canes. With Christmas sales at 50% off, I bought the entire set for $4.00. If you don't have a Hobby Lobby near you, I found a similar set with different colors (makes 16) on Amazon located here.
Materials Needed
- 27 Red beads – the beads slide together and remind me of dog bones
- 27 white beads – same as red
- 1 piece of wire
- wire pliers
- 1 piece of ornament string for hanging – any string will do
Instructions
- Take a piece of wire (about 8 inches) and use the needle nose wire pliers to form a loop at the bottom so your beads don't fall off.
- Give each girl 27 white beads and 27 red. Have them alternate them in a pattern.
- After the beads are attached, use the pliers to curl the opposite end.
- The girls can shape the their wire into a candy cane shape, add a string for hanger and Voila! – an ornament ready for hanging.
For our Brownies, I cut the wire and curled the end so they only had to put the beads on in the correct pattern. Once they had strung the beads, we then assisted them in curling the other end.
For our Juniors & Cadettes, we let them cut their own wire and do all of the work. We just assisted if needed.
The result – a super cute candy cane that they could hang on their tree that night. Even our older 8th grade girls, liked this and several asked if they could do more small crafts.
The whole craft took about 15-20 minutes for everyone to finish.

A couple of weeks ago, my co-leaders and I were looking for some fun, easy ornaments for our Daisy and Brownie Girl Scouts to complete. Our girls had 2 ½ hours to go to 10 different stations making crafts to take home – this was called a Make and Take Workshop.
While researching, we came across this great site called littlebitfunky.com in which she had made these adorable reindeer ornaments. (check her out for her version and a few different variations) We decided to try them out with a few modifications. The result: an easy, cheap, awesome craft that our girls and parents loved.
A few of the finished products…

The only things we needed were some brown paint, a black Sharpie, red sticker gems (original was done with red paint) and an ornament for each girl. Sharpies we had, brown paint was $.50 at Walmart, red gem stickers were $1.99 and the ornaments were only $3.00 for 12. So far, so good!
How to make it
- The girls wrote their names and the year at the bottom of the ornament. (Great keepsake for parents or grandparents)
- Next, they put their thumb in the brown paint and added their print to the ornament. I had them do it thick since we were only adding 1 print.
- Their ornaments were allowed to dry for about 10-15 min. Once dry, they added the antlers, and a red gem to stand for Rudolph's nose.
They looked super cute and the girls couldn't wait to put them on their tree.
Special thanks to littlebitfunky.com for the original idea.
mathewsonthaterhal.blogspot.com
Source: https://teacherscoutmom.com/category/girl-scout-crafts/
0 Response to "Easy Christmas Crafts for Girl Scout Juniors"
Post a Comment